If you feel lost among all the development setup needed to create a custom block, then this guide is for you.
We’ll look in detail at how the @wordpress/scripts package can be used to simplify Gutenberg block development. We’ll start by looking at the technical implementation of the tool. Afterwards we’ll use it to create and then customize a sample block.
You do not need to have any knowledge of custom block development to get started. The tutorial assumes that you are on MacOS X, but it also works with minor changes on Windows and Linux.
Table of Contents
- What Is Create Block?
- How Does Create Block Work?
- On Overview of Node Tooling
- Using the Create Block Command
- Structure of the Block
- Changing the block boilerplate code
- Building production code
- Conclusion
What Is Create Block?
The WP Create Block package is a project generator. Its focus is on generating a WordPress plugin with all the files needed for a working custom block.
This means that whenever you want to create a block, you do not need to do all of the set up yourself. Instead you run a single command, and all the source files and configuration setup is done for you.
The tool is open source, and is maintained by WordPress project.
How Does Create Block Work?
Create Block is a command line tool. This means that you interact with the tool by entering commands into a Terminal window.
There are only a couple of simple commands you need to know. However if you feel uneasy using the command line, I recommend reading this introduction post.
From a technical standpoint, the @wordpress/create-block package is a collection of JavaScript files. To web developers, this might at first seem surprising, as the JavaScript runs as a command line application.
This is made possible by Node.js, a JavaScript run-time environment that executes JavaScript code outside of a browser. Node, and the surrounding ecosystem, is crucial for modern JavaScript development.
So the @wordpress/create-block package is a specific type of JavaScript application, that relies on tools provided by Node to be installed and executed.
On Overview of Node Tooling
The JavaScript code in Create Block is bundled in packages, using the Node Package Manager, or NPM. These packages are then published to the NPM Registry.
The NPM Registry is an online collection of open-source software JavaScript packages. Developers can download these packages, and use them in their own projects.
To do so, developers can interact with this repository via the npm command line tool. As an example running npm install <package-name> will download the requested package to from the repository to your local machine.
npx is a companion to npm, focussed on command line applications and other executables. It downloads and then executes packages from the NPM Registry.
As Create Block relies on Node and NPM, make sure that you have these applications downloaded and installed on your machine.
Using the Create Block Command
Step 1: Check the tooling setup
First we need to verify whether Node and NPM are installed correctly.
Open a terminal window and type node -v. This will show the installed version of Node. It needs to be higher than version 14. Repeat the same for NPM with npm -v. The requirement here is higher than version 6.14.4.
Now that you are all set, we can start creating a plugin for a custom block.
Step 2: Initiate the create command
Navigate to the wp-content/plugins directory of your local development install. Then run npx @wordpress/create-block.
This will download and run the Create Block package. You’ll be asked to confirm whether you want to proceed.

This downloads all of the necessary code from the NPM repository. You them go right into the setup dialogue.
Step 3: Configuring the block
All the block configuration happens through an interactive dialogue.

Use the array keys to navigate between options, and hit Enter to confirm and proceed.
These are the questions that are asked:
- Is this a static or dynamic block?
- What is the block slug? This is also the name of the plugin directory that the command creates.
- What is the block namespace? Make this an unique identifier for your company or project.
- What is the display title? That’s the name of the block as it is displayed in the block inserter.
- Optional: what is the description of the block? This text is displayed in the editor when the user has inserted the block.
- Optional: what is the block icon? Through the command line you can only choose from the Dashicons that are part of WordPress.
- What is the category for the block? The list only includes the categories that are part of WordPress: Text, Media, Design, Widgets, Theme, and Embed.
- Do you want to customize the WordPress plugin? This allows you to configure the plugin headers of the block plugin.
I always choose yes here, so that I can set the Update URI to false. This prevents plugins on WordPress.org from interfering with my plugin.
Step 4: Test the plugin
Now all you have to do is sit back and wait for the command to finish.
For our example block, we chose hello-world as the block slug. You’ll find this directory now in wp-content/plugins.
In the WordPress admin, under Plugins, you’ll see our new plugin:

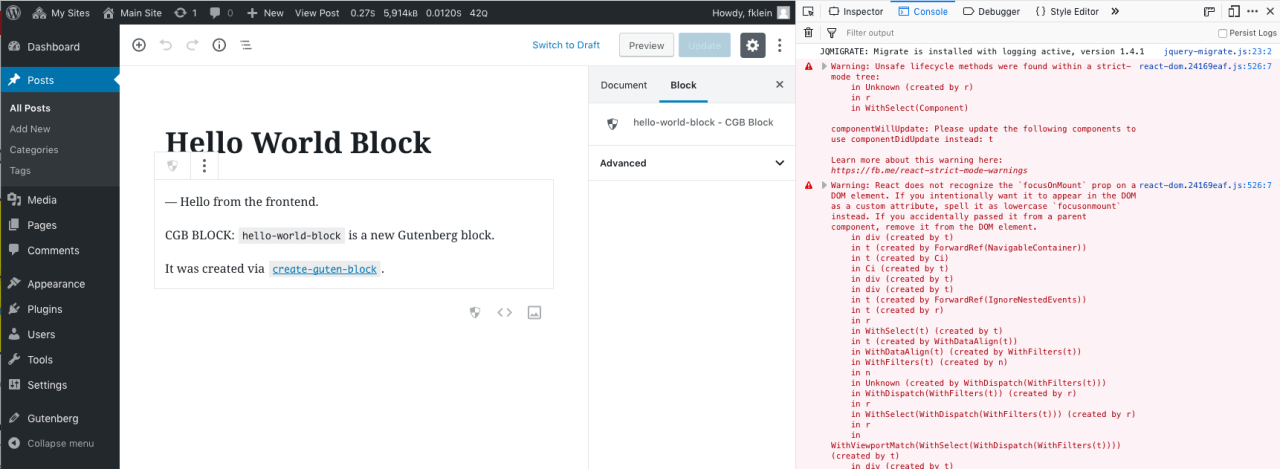
Activate the plugin and, add the block to a post:

The block has two different views for the back end and the front end.


Structure of the Block
This on overview of the files and directories contained in the Hello World block plugin directory:
hello-word
  |
  ├── build
  |  ├── block.json
  |  ├── index.asset.php
  |  ├── index.css
  |  ├── index.js
  |  ├── style-index.css
  |  ├── view.asset.php
  |  └── view.js
  |
  ├── node_modules
  |
  ├── src
  |  ├── block.json
  |  ├── edit.js
  |  ├── editor.scss
  |  ├── index.js
  |  ├── save.js
  |  ├── style.scss
  |  └── view.js
  |
  ├── .editorconfig
  ├── .gitignore
  ├── hello-world.php
  ├── package.json
  ├── package-lock.json
  └── readme.txt
Let’s take a look at what these files do.
Configuration files
.editorconfigcontains configuration for the code editor that you are using. You can read more about what this file does at EditorConfig.org..gitignoreis a starting point for which files to ignore from Git source control.
Main plugin file
The hello-world.php file contains the plugin headers, and the call to the register_block_type() function.
This PHP file reads the block.json from the build directory. This directory contains the built version of the plugin, which is different from the source code. We’ll look into how this build process works in the next section.
There is no other PHP code needed. The block configuration file handles everything from this point on.
The source directory
The src directory is where the source code for the block lives:
index.jsis the central entry point for the build process. Therefore any JavaScript file that is not included here won’t be part of the build.
This file also contains the code to register the block on the client side. And it includes thestyle.scssfile, so that the build process can discover it, and build it into CSS.edit.jscontains the JavaScript code for the editor view (backend) of the code.editor.scsscontains the styles for the editor view of the block.render.phponly exists for dynamic blocks. It contains the PHP code for the frontend view.save.jsis only present for static blocks. It contains the JavaScript code to generate the markup for the frontend view.style.scsscontains the shared styles for both the frontend and the backend of your site.view.jsis always present, but mostly not needed. This file is for any JavaScript that your block might need on the frontend.
The build directory
The build directory contains the files built from source. It’s this code that powers the block in WordPress, and it gets generated from the source code.
block.jsonis copied over as-is from the source directory. This is because there are no changes done to this file.index.asset.phpis an internal file used to track the dependencies or your code.
Whenever you include a package, like for example@wordpress/blocksin your JavaScript code, an entry for this package file is added here. That way only the dependencies that are needed are loaded.
In addition this file also contains a version hash. This chain of characters identifies the current build version, and ensures that the browser will load your new block assets if needed.index.csscontains the compiled and minified Sass from the block editor-only styles.
index.jscontains all the JavaScript for your block, transpiled and minified.render.phpis copied over as-is, is it is not necessary to make changes to the PHP.style-index.csscontains the compiled and minified Sass from the shared backend and frontend styles.view.asset.phpis an internal file used to track the dependencies of your frontend JavaScript file (theview.js). It works the same asindex.asset.phpview.jscontains the JavaScript for your frontend interactivity.
The Node files
The package.json file contains the list of NPM packages used by the project. It also registers the scripts that can be run on local via NPM.
The package-lock.json file contains the exact list of packages that you have installed. This is because usually packages use a version range, so for example anything in the 2.x branch.
The lock file contains the exact version installed, for example 2.3.1. This serves two purposes:
- Every developer that installs the project gets the exact same dependencies. This avoids different developers working with different versions.
- NPM can compare your installed versions with those available, and notify you about available updates.
The node_modules directory contains the source code of all the NPM packages used by the project. These files were downloaded from the NPM directory during the creation process of the plugin.
Changing the block boilerplate code
Let’s modify the boilerplate code to see how Create Block is used during development.
To clarify at this point, you are no longer working with the Create Block package. Instead you are working with the @wordpress/scripts package, also called WP Scripts.
It’s this package that provides all of the functionality described below.
Using the development mode
To do so, you need to switch into the hello-world directory, and run npm run start.

This will create a new build from the current source code. In addition, the files in the source directory are followed for any changes. This means that the build is refreshed whenever a change is done to any JavaScript or SCSS files.
Modifying code
We now can go into sr/editor.scss set the background property to #000. This is what the styles will look after the change:
.wp-block-wpdc-hello-world {
    background: #00;
    border: 1px dotted #f00;
}
I
When you now reload the Edit Post screen of the the Hello World post we created earlier, you’ll see that the background of the block has changed.

How did this happen? When in development mode, all JavaScript and Sass files will be rebuild automatically on every change. You still need to reload the page though to see the changes.
Debugging issues
The React code generated in this mode is not optimised for production. Therefore if you run WordPress in development mode, you’ll be able to see error messages in the browser console when the block is broken.
In addition, the Terminal window in which you have run npm run start will display error messages for issues in the JavaScript code.

Building production code
Once your block is ready, and you want to use it on a production website, you can run npm run build.
Conclusion
If you have gotten this far, then congratulations for completing the tutorial! You now should be ready to start building your own blocks.
If you’re looking to go beyond the basics, and truly master custom block development, check out my guide to learning custom block development.